

Sourdough Starter and Basic Sourdough Bread by Heidi Hedecker
The sourdough starter recipe and sourdough bread recipe below, and all of the step-by-step photos are by Heidi Hedeker, certified master baker and a pastry chef instructor with Kendall College since 2004. She is an associate professor there, and working on a baking program for kids with immigrant roots called ‘It Bakes a Village’.

Overview:
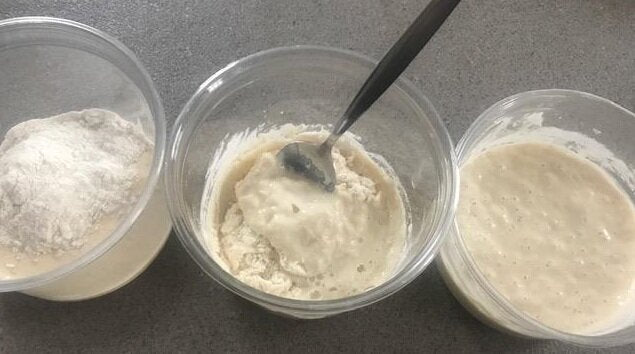
It takes about five days to create a sourdough starter, but may take longer depending on the conditions. As the wild yeast and bacteria in your starter grow stronger, the starter will become more frothy and active.
Please Note:
FLOURS: Dark Rye and Artisan Blend. Your starters feedings will progress from solely Dark Rye flour, to a mixture of Dark Rye and Artisan Blend Bread flour, to Artisan Blend Bread flour only.
WATER: 90 degrees and no chlorine. To sufficiently energize your starter, make sure your water is around 90F at each feeding. If possible, use chlorine-free water.
From Day 3 to Day 5, the proportions and timings of the feedings will remain the same.
COVER: Always keep your sourdough lightly covered with a porous cloth or a slightly open lid to allow your sourdough to breathe.
First, Gather Your Materials
- Tools: Two clean glass jars or plastic containers
- Kitchen Scale
- Thermometer
- Spatula
- Rubber band
Ingredients:
- ¾ cup (80 g) Janies Mill Dark Rye flour
- 1 ¾ cup (210 g) Janies Mill Artisan Blend flour
- 1 ½ tsp. (10 g) honey
- Water
For more information and help troubleshooting your sourdough, check out these great resources, and Cecilias blog recipe for Sensible Sourdough Recipe, with tons of tips.


KEEP YOUR STARTER FED

Basic Sourdough Bread
Makes two loaves
For the leaven:
-
1 tablespoon active sourdough starter (If your sourdough has been in the refrigerator, take it out 2 or 3 days before you plan to bake. Feed it daily to make sure it's strong and active before you make the bread.)
-
75 grams Artisan Blend Bread Flour or other bread flour (1/2 cup)
-
75 grams water (1/3 cup)
The night before you plan to make the dough, place all the leaven ingredients in a large bowl and mix to form a thick batter. Cover and let stand at room temperature overnight, about 12 hours.
For the dough:
-
525 grams water (2 1/2 cups), divided
-
1 tablespoon salt
-
700 grams High Protein Bread Flour flour or other bread flour (5 1/2 cups)
MAKE THE DOUGH
-
Make sure your leaven is active. Generally, if the surface of the leaven is very bubbly, it's ready to be used. To double check, drop a small spoonful of the leaven in a cup of water; if the leaven floats, it's ready.
-
Dissolve the salt. Place 50 grams (about 1/4 cup) of the water and the salt for the dough in a small bowl. Set aside, stirring occasionally to make sure the salt dissolves.
-
Mix the leaven and water. Add the remaining 475 grams (2 cups) of water for the dough to the bowl of leaven. Stir with a spatula or use your hands to break up and dissolve the leaven into the water. It's OK if the leaven doesn't fully dissolve and a few clumps remain.
-
Add the flour. Add the flour and stir with a rubber spatula until there are no more bits of dry flour and it forms a very shaggy dough.
-
Rest the dough (30 minutes, or up to 4 hours). Cover the bowl with plastic wrap or a clean kitchen towel. Let the dough rest for at least 30 minutes or up to 4 hours. This is the autolyse stage where the flour is fully absorbing the water and enzymes in the flour begin breaking down the starches and proteins.
FOLD
-
Mix in the salt. Pour the dissolved salt over the dough. Work the liquid and salt into the dough by pinching and squeezing the dough. The dough will feel quite wet and loose at this point.
-
Fold the dough (2 1/2 hours). Grab the dough at one side, lift it up and fold it over on top of itself. Fold the dough four times, moving clockwise from the top of the bowl. Let the dough rest 30 minutes, then repeat. Do this a total of 6 times, every half hour, for a total of 2 1/2 hours. The dough will start out shaggy and very loose, but will gradually smooth out and become tighter as you continue folding.
-
Let the dough rise (30 to 60 minutes). Once you've finished the folds, cover and let the dough rise undisturbed for 30-60 minutes.
SHAPE
-
Divide the dough. Sprinkle some flour on a work surface and turn the dough out on top. Use a pastry scraper to divide the dough in halfwork gently to avoid deflating the dough.
-
Pre-shape the dough into loose rounds. Sprinkle a little flour over each piece of dough. Use your pastry scraper to shape each one into a round shape by slipping your pastry scraper under the edge of the dough and then scraping it around the curve of the dough. Do this a few times to build the surface tension in the dough. Flour your pastry scraper as needed to keep it from sticking to the dough.
-
Rest the dough (20 to 30 minutes). Once both pieces of dough are shaped, let them rest for 20 to 30 minutes to relax the gluten again before final shaping.
SHAPE AND PROOF
-
Prepare 2 bread proofing baskets, colanders, or mixing bowls. Line your containers with clean kitchen towels. Dust them heavily with flour, rubbing the flour into the cloth on the bottom and up the sides with your fingers. Use more flour than you think you'll need!
-
Shape the loaves. Dust the top of one of the balls of dough with flour. Flip it over with a pastry scraper so that the floured side is against the board and the un-floured, sticky surface is up. Shape the loaf similarly to how you folded the dough earlier: Grab a bit of the dough near the bottom, pull it up gently, then fold it over onto the center of the dough. Repeat with the right and left sides of the dough. Finally, repeat with the top of the dough, but once you fold it downward, use your thumb to grab the bottom lip again and gently roll the dough right-side up to form a round ball. You may cup your palms around the dough and rotate it against the counter to shape it into a tighter round. Repeat with the second ball of dough.
-
Transfer to the proofing baskets. Dust the tops and sides of the shaped loaves generously with flour. Place them into the proofing baskets upside down, so the seams are on top.
-
Let the dough rise (3 to 4 hours, or overnight in the fridge). Cover the baskets loosely with plastic wrap, or place them inside clean plastic bags. Let them rise at room temperature until they have puffed up, 3 to 4 hours. Alternatively, place the covered basket in the refrigerator and let them rise slowly overnight, 12 to 15 hours. If rising overnight, bake the loaves straight from the fridge.
BAKE
-
Heat the oven to 500°F. Place two Dutch ovens or other heavy-bottomed pots with lids in the oven, and heat to 500°F. (If you don't have two pots, you can bake one loaf after the next.)
-
Transfer the loaves to the Dutch ovens. Carefully remove one of the heated Dutch ovens from the oven and remove the lid. Tip the loaf into the pot so the seam-side is down. Repeat with the second loaf.
-
Score the top of the loaf. Use a lame, sharp knife, or serrated knife to quickly score the surface of the loaves. Try to score at a slight angle, so you're cutting almost parallel to the surface of the loaf.
-
Cover and bake the loaves for 20 minutes. Reduce the oven temperature to 450°F and bake another 10 minutes.
-
Remove the lids and continue baking 15 to 25 minutes. Continue baking uncovered another 15-20 minutes, or until the crust is deeply browned.
-
Cool the loaves completely. When done, lift the loaves out of the pots using a spatula. Transfer them to wire racks to cool completely. Wait until they have cooled to room temperature before slicing.
-
Posted on February 18 2024