

Fantastic Focaccia by Elder & Oat
With a name that translates to “hearth bread,” our focaccia at Elder & Oat is best enjoyed surrounded by the warmth of kith and kin. This bread holds its own as a standalone savory (or sweet) meal option, but is also an exceptional accompaniment to a variety of meals. Personally, we love to use it as a platform for our favorite sandwiches. Or you can simply enjoy it as the Ligurians do… for breakfast, dipped into your cappuccino!
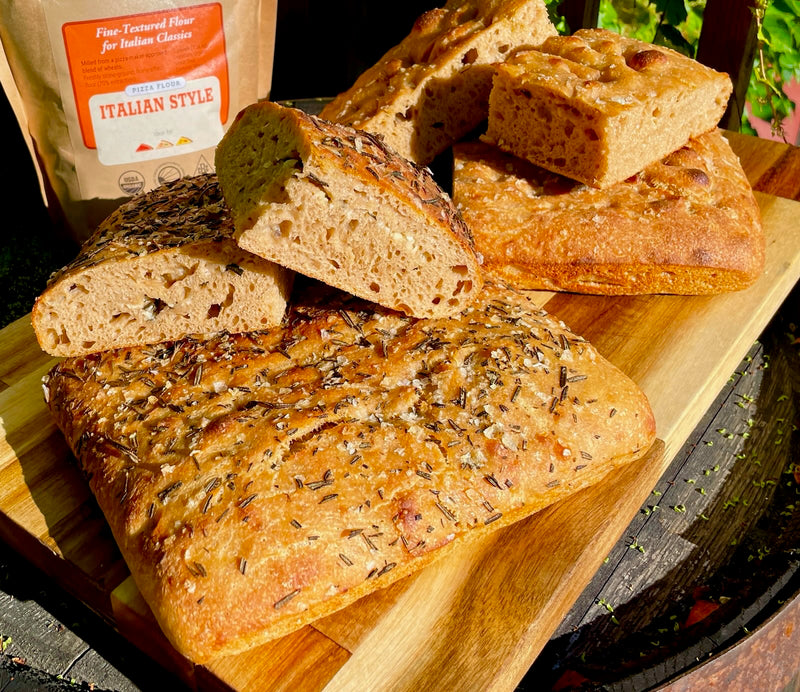
 Recipe and Photos by Elder & Oat. Follow them @elderandoat
Elder & Oat is West Dundee’s community coffee shop and micro-bakery. When you visit, you'll indulge in a specially crafted menu that features wholesome, locally and sustainably sourced ingredients and unique flavor combinations. The shop itself provides a home away from home with lounge-style seating, relaxing music and welcoming baristas. It fills the soul and fuels the body, making it the perfect setting to peacefully work, catch up with friends, or simply enjoy the ambiance.
 The highlight of our month is getting to see Harold’s smiling face, offering him a snack or coffee, and having a nice chat!
Yield: 1 loaf (approx. 10x14")
Ingredients
For the leaven
* Alternatively, you may substitute approx. 5g (2 tsp) of instant yeast. Bloom the yeast in 65g (¼ cup)~95 degrees F water.
- 300g (1 ¾ cups) Janie’s Mill Italian Style Pizza Flour
- 300g (1 ¾ cups) Janie’s Mill Artisan Blend Bread Flour
- 40g (⅓ cup) Janie’s Mill Frederick Cake Flour
- 485g (2 cups) water
- 20g (2 tbsp) extra virgin olive oil
- 14g (1 tbsp) sea salt
- 216g (2 ⅛ cups) leaven (from above)
- ~170g (¾ cup) olive oil
- ~20g (2 tbsp) flaky sea salt (such as Maldon)
Equipment
- Large mixing bowl
- 10”x14” metal pan or sheet tray
- Container with lid
Instructions
Day Before Bake
1. Mix together the leaven ingredients until no dry flour remains. Let sit at room temperature for at least 8 hours, preferably overnight. It will be “bubbly and active” when ready.
Build the Dough
1. Initial Mix - In a large bowl (using your hands), mix together ONLY final flour and water until no dry flour remains.
2. Autolyze - Let dough rest for a minimum of 20 minutes and up to ~1 hour. (See Baker's notes #2 and #3 below.)
3. Final Mix - Add remaining ingredients and mix thoroughly with your hands until no lumps remain. Transfer the dough to a bulk proof container and cover. A large bowl or bin with a lid works well.
4. Bulk Ferment - Let dough rest for 30 minutes in the container, then "Stretch and Fold" every 30 minutes for 2 hours. To do so, grab one side of the dough and lift, stretching it before folding it on top of the dough. Repeat this process for 4-6 “sides” of the dough.
5. Cold Ferment - Either leave dough in the bulk proof container or transfer the dough to a refrigerator appropriate container. Cover with plastic wrap and/or lid and refrigerate for a minimum of 8 hours, up to 24 hours.
Day of Bake
1.Transfer & Rest - Transfer dough to a WELL OILED Detroit style pizza pan, or any 10”x14” metal baking pan. (Alternatively, you can place the dough on a sheet tray lined with parchment.) Stretch the dough to fill the pan, or to a size of approx 10”x14” on the sheet tray. Let rest at room temp for a minimum of 20 minutes, until the dough relaxes. Stretch dough again to fill the pan.
2. Oil - Liberally oil the top of the loaf. The amount of oil will seem excessive; that’s a good thing! Dimple loaf with fingers, pressing down deeply. Sprinkle flaky sea salt over top of dough.
3. Optional - Top dough with desired optional toppings. (See Baker's note #5 below.)
4. Preheat - Preheat oven to 450 degrees F.
5. Bake - Bake for 10 minutes. Then lower the temperature to 425 degrees F, rotate pan, and bake for another 15-20 minutes, until the edges are gold and crispy.
6. Rest - Rest for at least 5 minutes, then remove from the pan. (See Baker's Note #4 below.)

vBaker’s Notes:
- All Imperial amounts are estimates. We highly recommend weighing with a digital scale!
- Pay attention to the dough. Learn to know what the dough feels like when it is ready for the next step!
- The process and times will vary based on the ambient room temperature and humidity level. If your kitchen is cooler, each step will take slightly longer. And vice versa.
- The bread is best served fresh. If you want to keep it for longer than a day , we recommend slicing it into “toaster size” slices and freezing them. Then just pop the slices into the toaster and slather with your favorite butter, oil, jam, cheese, or whatever!
- In our cafe, we serve slices of the focaccia with a variety of homemade spreads (pesto, blistered tomato, savory ricotta, chili crunch, compound butter, etc.) and use it as the base for our variety of sandwich options. Scroll down for some of our favorite toppings!
Theme and Variations
Here are a few points of inspiration and adaptation:
You may begin with flour substitutions for just the Frederick Cake Flour, then experiment with more! We suggest using:
- Janie' Mill Dark Rye Flour
- Janie's Mill Spelt Flour
- Janie's Mill Sifted Durum Flour
- but honestly...any of your favorite Janie's Mill Flours will work!
- Garlic + Onion + Rosemary
- Cheddar + Bacon + Corn
- Potatoes (sliced extremely thin)
- Sun Dried Tomato + Basil + Balsamic
- Artichoke Hearts + Feta
- Blueberry + Lemon Glaze
- get creative…the world is your focaccia!!!!
Posted on August 15 2022